Domains
Manage a domain
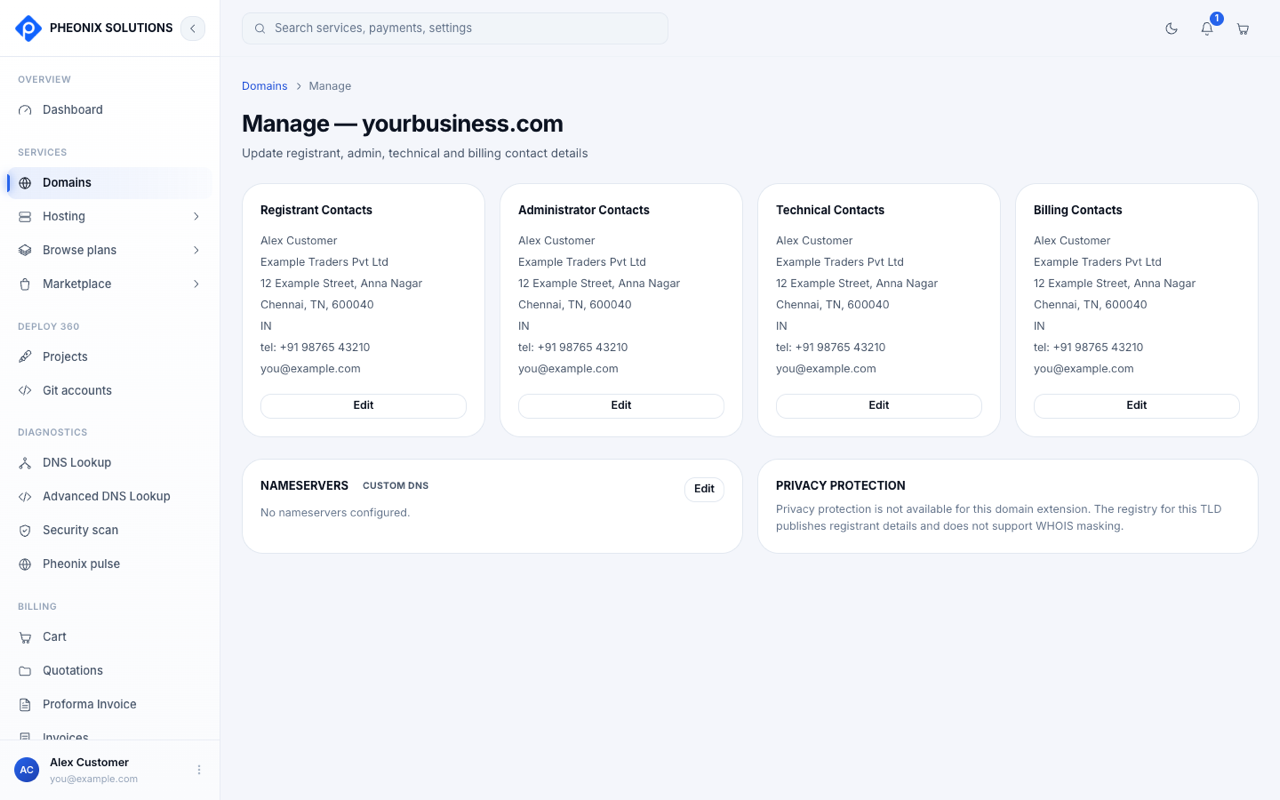
Go to Domains and select Manage next to the domain. The page has three areas: contacts, nameservers and privacy protection.
Contacts
Every domain has four contacts. Each card shows the name, company, address, country, phone number and email.
| Contact | Who it is |
|---|---|
| Registrant | The legal owner of the domain. If the domain is registered on behalf of a company, the company is the owner. |
| Administrator | The person who handles decisions about the domain |
| Technical | The person who handles DNS and technical issues |
| Billing | The person who handles renewals and payments |
For a small business, all four are often the same person.
Edit a contact
- Select Edit on the contact card.
- Update the details. Fields marked * are required:
- First name and Last name (letters and spaces only)
- Domain is registered on behalf of a company: tick this and enter the company name if a business owns the domain
- Address, City, Country, State/Province and ZIP/Postal code
- Phone number (digits only) and, optionally, Fax number
- Email address
- To copy these details to the other contacts, tick Use for Administrative Contacts, Use for Technical Contacts and/or Use for Billing Contacts.
- Select Save. Select Cancel to leave without changing anything.
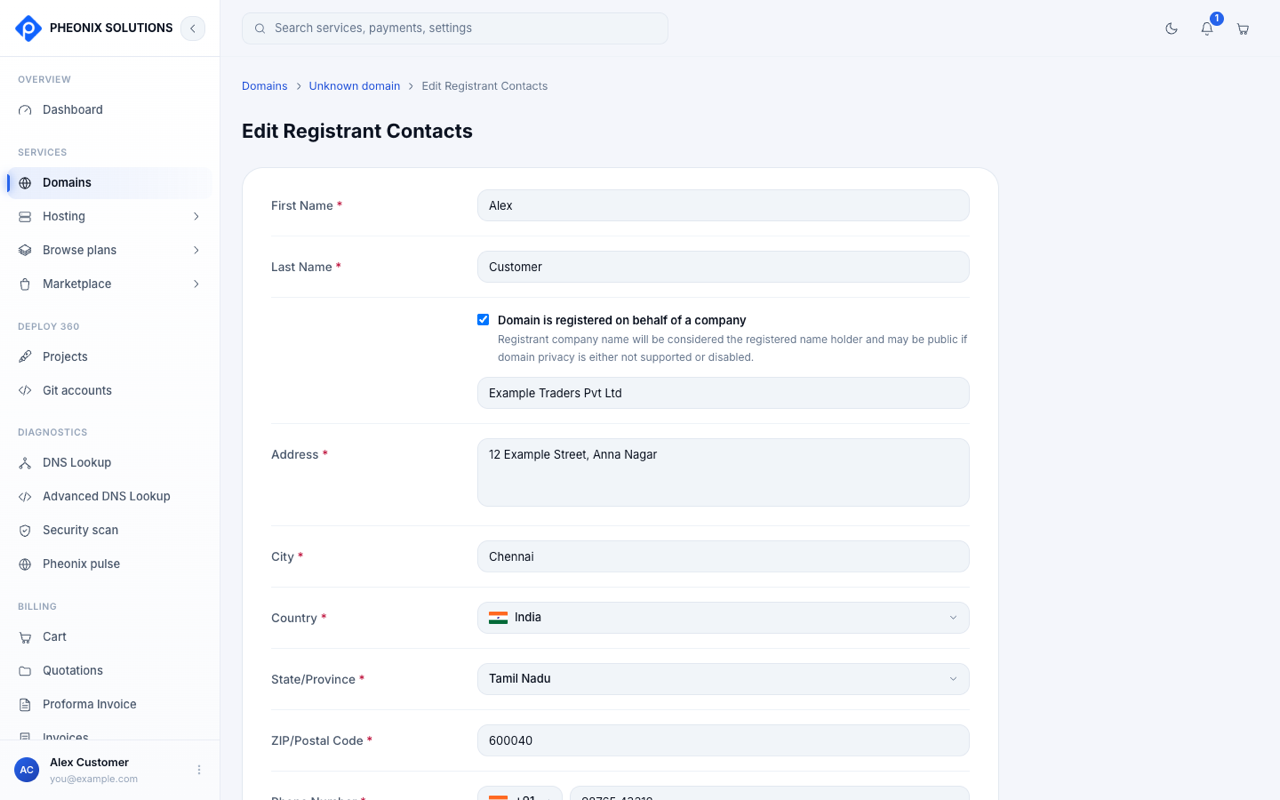
The registry sends important messages to the registrant email, including ownership verification and transfer approvals. If the domain isn't verified, the registry can suspend it.
If the domain has no privacy protection, the company name you enter can be shown publicly as the domain's owner in WHOIS.
Nameservers
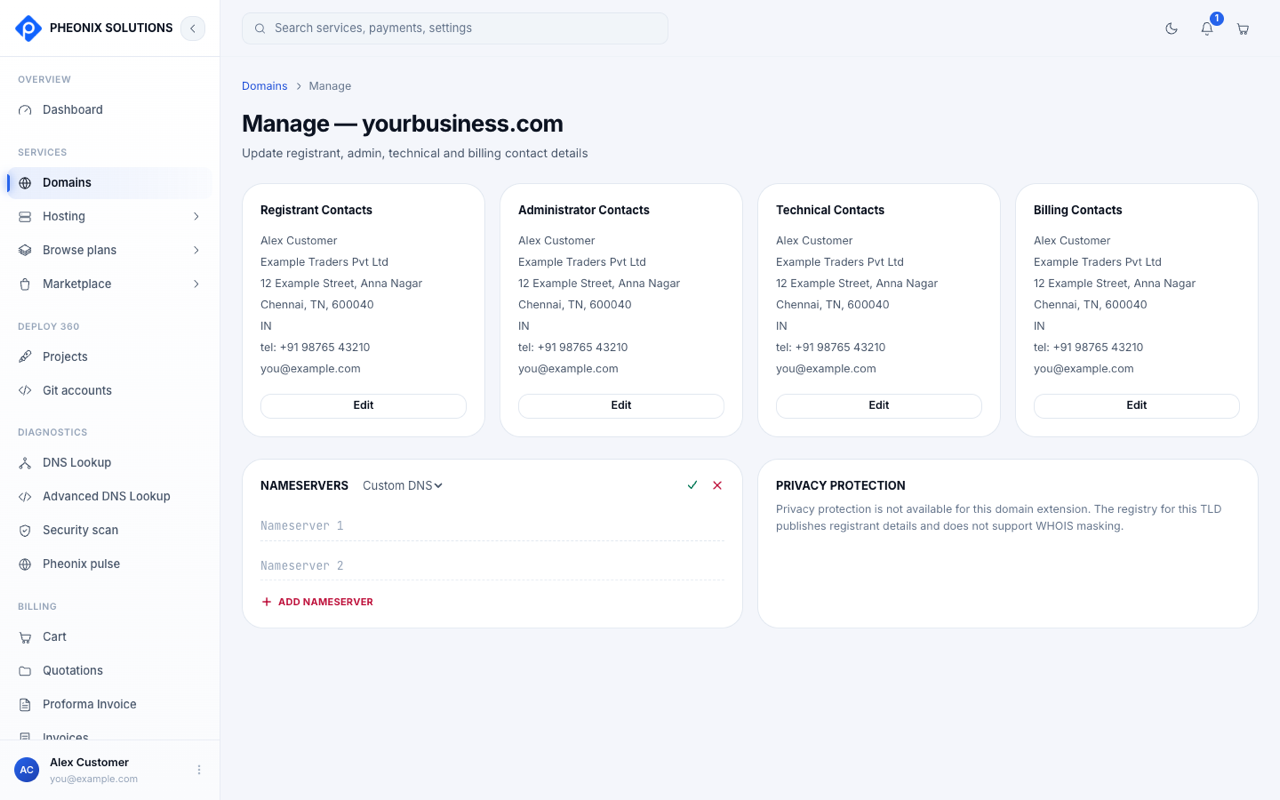
Nameservers decide which DNS service answers for your domain, and so where your website and email point. The card shows the current setting: Basic DNS or Custom DNS.
Change nameservers
- Select Edit on the Nameservers card.
- Choose the type:
- Basic DNS: use the registrar's default nameservers.
- Custom DNS: use your own, for example those of your hosting provider or Cloudflare.
- For Custom DNS, enter at least 2 nameservers, for example
ns1.example-host.comandns2.example-host.com. Select + Add nameserver to add more, up to 6. - Select the ✓ to save, or ✕ to cancel.
Nameserver changes can take up to 24–48 hours to reach every network. Check progress with DNS Lookup, or use the Propagation tab in Advanced DNS Lookup.
"No nameservers configured" means the domain doesn't point anywhere yet, so websites and email on it won't work. Set nameservers before you go live.
Common error messages:
| Message | Fix |
|---|---|
| At least 2 nameservers are required. | Add a second nameserver |
| You can set a maximum of 6 nameservers. | Remove the extras |
| "…" is not a valid nameserver hostname. | Check for typos. Use a full hostname like ns1.example.com, without http://. |
Privacy protection
With privacy protection on, your name, address, phone number and email are hidden from public WHOIS lookups. Anyone who emails the masked address reaches your registrant email.
- To turn it on, select Turn on.
- To turn it off, select Turn off and confirm with Yes, make my details public.
Some extensions, such as .bet and some country domains, don't support privacy. Their registry always publishes the registrant's details. For these domains the card says: Privacy protection is not available for this domain extension.
If something goes wrong
If the registrar can't complete a change, you see a message such as We were unable to complete this request with the domain registrar. Wait a few minutes and try again. If it keeps happening, contact support with the domain's order ID.