Hosting
Shared hosting
Shared hosting gives you a cPanel account for your website, email accounts, databases and files. We look after the server. Go to Hosting → Shared to see your accounts.
Order shared hosting
- Select Order hosting, or go to Browse plans → Shared.
- Choose Monthly or Yearly. Yearly costs less over the year.
- Compare the plans and select Add to cart on the one you want. See Choose a hosting plan.
- Check out.
After payment, the app shows Setting up your hosting while your cPanel account is created. This usually takes a moment. Then you see Your hosting is ready, and the account appears in your list.
Your hosting accounts
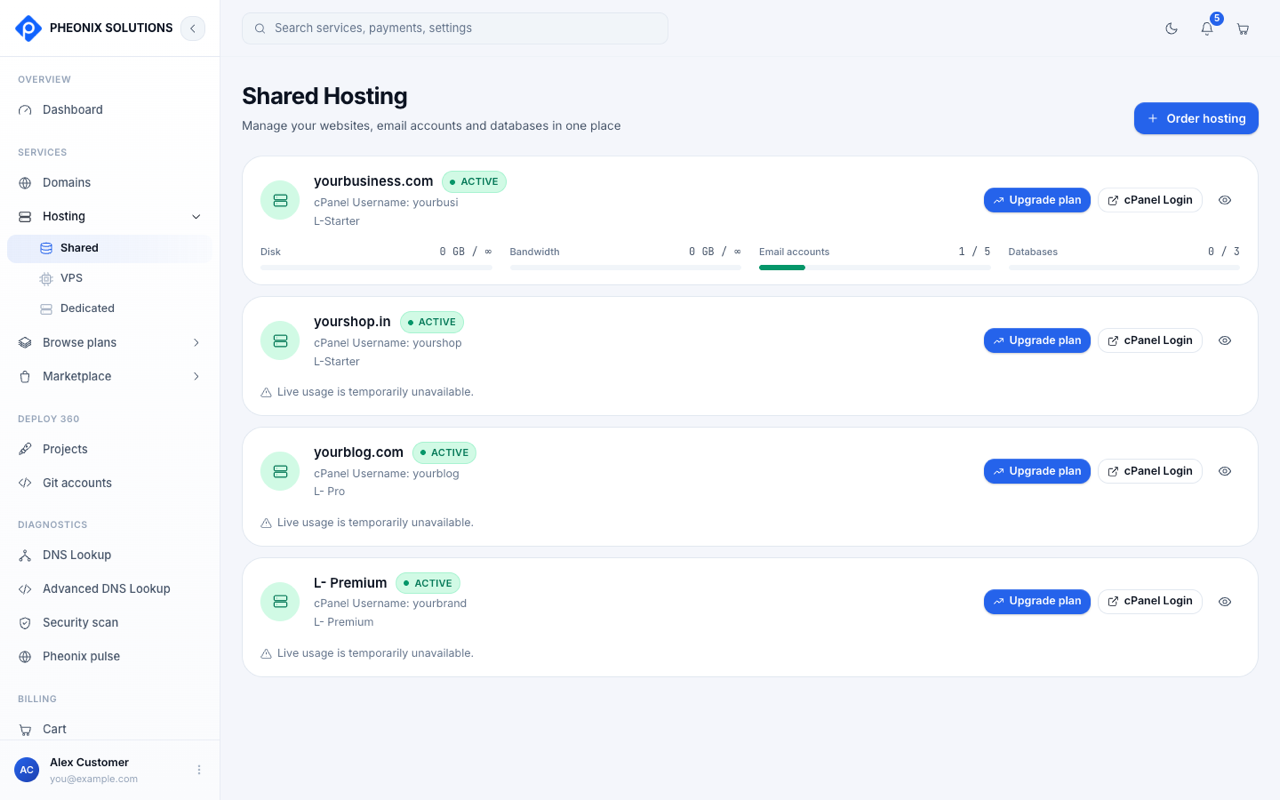
Each account card shows:
| Item | What it is |
|---|---|
| Domain | The main domain of the hosting account, for example yourbusiness.com |
| Status | Active when the account is running and paid up |
| cPanel Username | The username of your cPanel account. Use it for FTP and when contacting support. |
| Plan | Your current plan, for example L-Starter |
| Usage bars | Disk, Bandwidth, Email accounts and Databases used, out of what your plan allows |
| Upgrade plan | Move to a bigger plan (see below) |
| cPanel Login | Open cPanel, already signed in |
| Eye icon | Open the account's details page |
Reading the usage bars
- Usage shows as used / limit. For example,
1 / 5email accounts means you've created 1 of the 5 your plan includes. - ∞ means unlimited on your plan.
- When a bar is nearly full, consider upgrading your plan.
- "Live usage is temporarily unavailable" means we couldn't reach the hosting server to read the numbers. Your website and email keep working; try again later.
Open cPanel
Select cPanel Login. cPanel opens in a new tab, already signed in, so you don't need a password. In cPanel you can:
- upload your website files (File Manager or FTP)
- create email accounts for your domain
- create MySQL databases and users
- install apps such as WordPress
- manage subdomains, add-on domains, SSL and backups
If cPanel doesn't open, check that your browser isn't blocking pop-ups for app.pheonixsolutions.com, then try again.
Account details
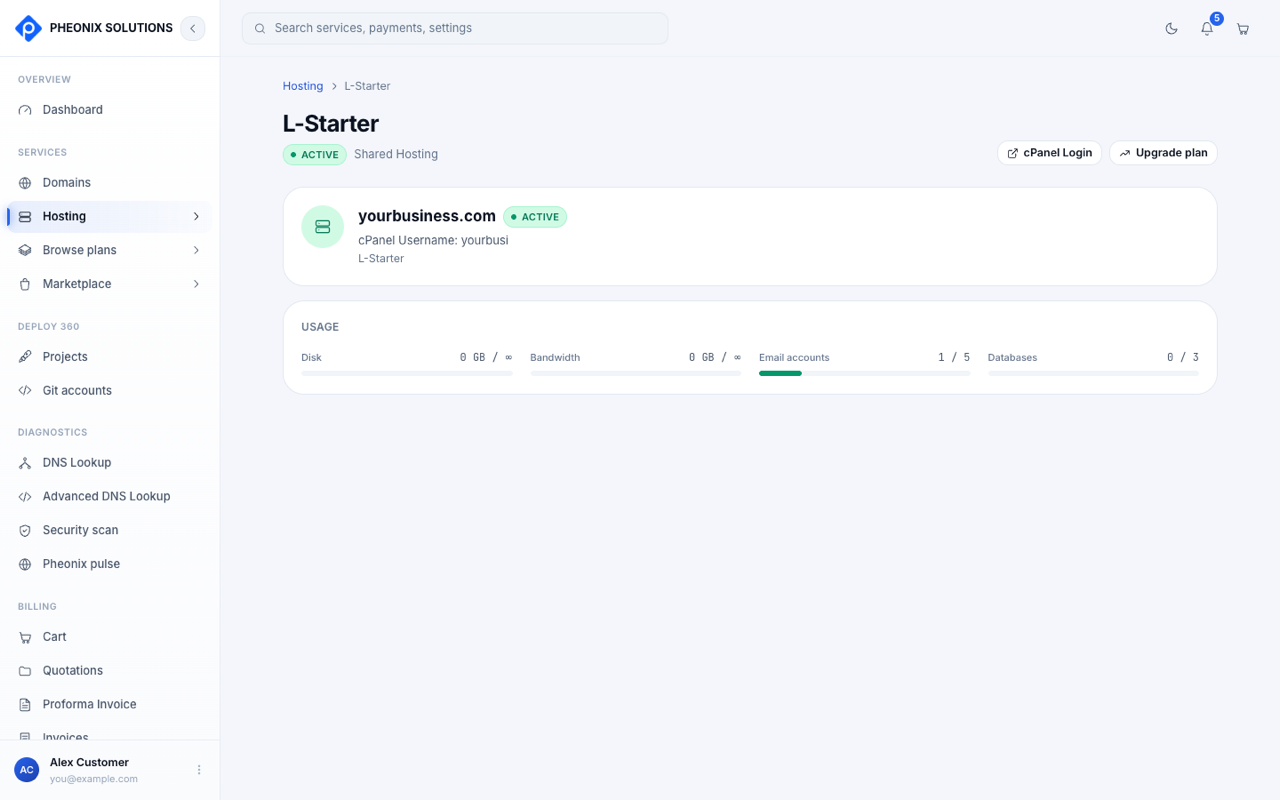
Select the eye icon on a card to open the account's details page. It shows the plan, status and domain, with cPanel Login and Upgrade plan at the top, and a Usage section below.
Upgrade your plan
Need more email accounts, databases or disk space? Upgrade without moving your website.
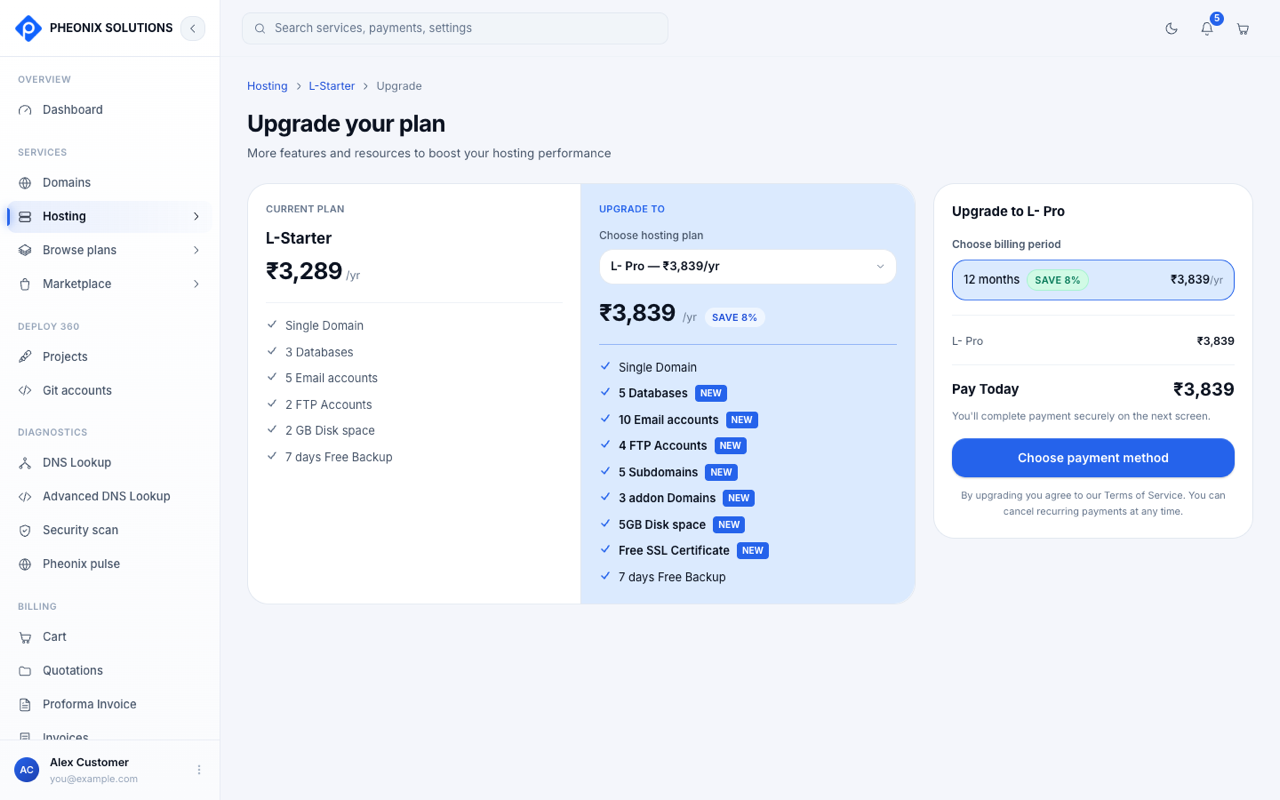
- Select Upgrade plan on the account card or details page.
- Under Upgrade to, choose a plan in Choose hosting plan. Features you gain are marked NEW.
- Under Choose billing period, check the term.
- Check Pay Today, then select Choose payment method and pay on the secure payment page.
Good to know:
- Only plans that are bigger than your current plan are listed.
- If you're billed monthly, you can also switch to yearly while upgrading. Yearly plans stay yearly.
- When you upgrade within your current period, you only pay the prorated difference.
- After payment, you see Upgrade complete, and you can Download invoice and Download receipt. Your account moves to the new plan shortly after.
If you cancel on the payment page, nothing changes: Upgrade payment cancelled. You can try again anytime.
Renewals
Your shared hosting renews at the end of each billing period. Upcoming renewals are listed on the dashboard under Renewal status. If a renewal isn't paid, the account shows Renewal pending and can be suspended after the grace period. See Invoices, payments and renewals.